Method 1. Stop all those apps loading at startup
When you install new apps, many add themselves to the Startup list, which means Windows has to launch them, or at least part of them, each time it boots up. Add these all up and it can take ages before your laptop or PC displays the Windows login screen. Some of these apps do need to be in that list, especially services such as OneDrive, Google Drive, or anti-virus packages. It’s convenient and – for some apps – essential. Fortunately, it’s fairly easy to stop those apps from loading. Press CTRL+SHIFT +ESC together and Task Manager will appear. If this is the first time you’ve used it you’ll need to click the ‘More details’ option at the bottom of the window. Now you should see a list of all the programs running on your system.
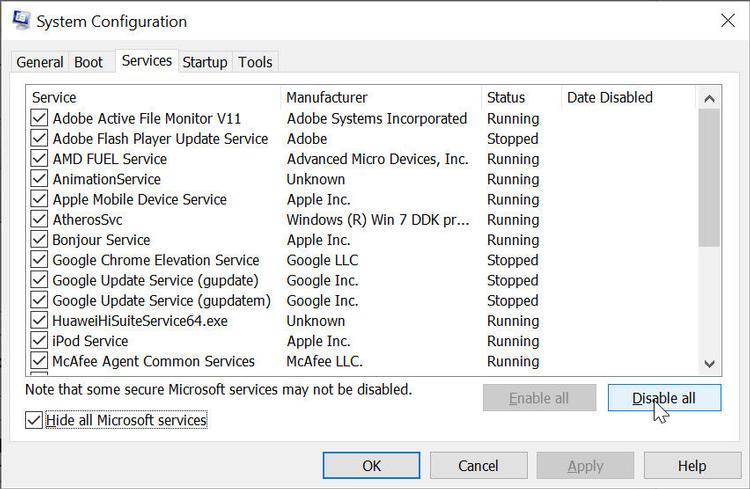
Select the Start-up tab and you’ll now be able to disable any apps that you think could do without when you first turn on your PC. For a more in-depth explanation of how this works try our How to change Windows 10 startup programs guide. Bear in mind that you’re not removing the programs from your PC. You can still use them, but they won’t automatically start up. And it’s probably only worth disabling those that have a High or Medium impact. Disable them by right-clicking on each one in turn and selecting Disable. As a guide, you can usually disable ‘updater’ or ‘helper’ programs. The associated program won’t automatically update, though, so you’ll have to check manually for updates. As we said, these programs run for convenience, mostly. If you disable something and a crucial feature or function stops working, simply re-enable the app in the Task Manager. We recommend doing a clean boot, which involves disabling all startup programs. You’ll also need to stop the stuff which isn’t shown in Task Manager. To do that, press WIN+R, and type msconfig into the box which appears, and press Enter. Click on the Services tab, then tick the ‘Hide all Microsoft services’ box, then click the Disable all button:
Click OK and you’ll be asked if you want to reboot now or later. If you’ve already disabled everything in Task Manager, you can restart now. And hopefully your computer will boot in a respectable time. Unfortunately this won’t tell you which service or app was causing the problem, so you’ll have to go through and re-enable them one by one to work out which is the culprit. But in the meantime, at least you won’t be waiting 10 minutes each time Windows starts up.
Method 2. Update, update, update
Sometimes a dodgy driver or a bug in an update can cause Windows systems to slow down, so it’s worth making sure Windows, drivers and programs are up to date. To check for any available Windows updates press the Windows key+I and then select Update & Security. In here you’ll see an option to either check for updates or install ones that are available.
Do this, reboot your machine, and see if there are any improvements. For drivers, it can be worth installing a ‘driver updater’ program which will do the hard work for you. Otherwise you’ll have to check manually for all your hardware, from a printer, to your graphics card and other hardware attached to your PC.
Method 3. Check for malware and viruses
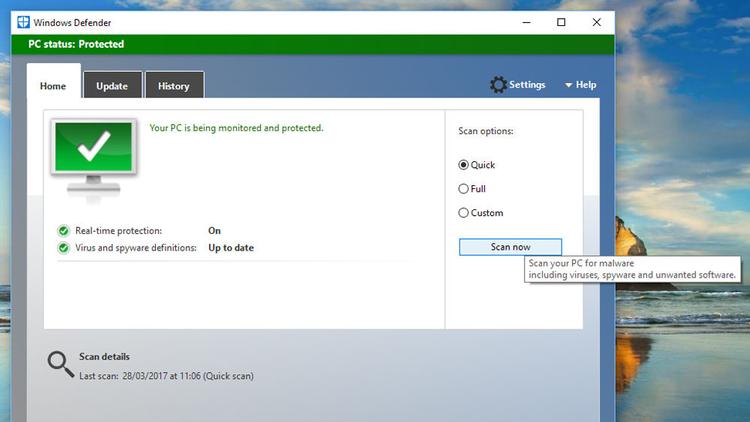
Another reason for slow booting could be malware, which is a regular cause of performance drops in Windows, so you should regularly give your PC a health check. Either use the antivirus software that’s installed on your PC already, or if you’re using Windows Defender then press Windows key+I, select Update & Security, then click on the Windows Defender section on the left column. In the Windows that appears you’ll see the top option is Open Windows Defender. Click this then choose Full in the Scan options section and click Scan now.
The process takes a good while, so it’s best to begin a scan before you go to bed and let it run overnight. If you use another security package then you’ll need to launch it and look for similar options. When the scan is complete you’ll know whether your system is compromised or not. If it is then run any fixes your software advises. If not then you’ll need to move to more drastic measures.
Method 4. Reset Windows
Another way you might be able to fix the problem is to reset Windows, which is easy in Windows 10. Windows has various safeguards in place to ensure you won’t lose any data, but we’d recommend taking a look at this backup software to protect your photos, music, documents and other important information. With your data safely backed up you can now begin. Press Windows key+I, select Update & Security, then choose Recovery from the list in the left hand column.
At the top of the page you’ll see the option to Reset this PC. Click Get started and you’ll then see a blue box appear with two choices – Keep my files and Remove everything.
Choose the former if you want your data left in place, or the latter for a completely fresh version of Windows 10. Your PC will now reinstall Windows and hopefully leave you with a much faster boot time when it’s finished.
Method 5. Install an SSD
If all the software avenues have been explored then the final consideration is hardware. Replacing your old hard drive with a new superfast SSD is a sure way to grant huge speed boosts on older machines. So if you’re not frightened of opening up your machine, here’s how to install an SSD in your PC. Martyn has been involved with tech ever since the arrival of his ZX Spectrum back in the early 80s. He covers iOS, Android, Windows and macOS, writing tutorials, buying guides and reviews for Macworld and its sister site Tech Advisor.